Hiển thị các bài đăng có nhãn Paper. Hiển thị tất cả bài đăng

Thứ Năm, 20 tháng 10, 2011

Handmade gift bag

JRB CFBH gift bag 14 finished

Top Note Gift Bag Tutorial

 Paper crafts
JRB CFBH gift bag 1  

You need  1 piece of  6 X 11.5 DSP.  I had originally tried 6 X 12, but the Die did not cover the edges then.  I am using one from the Sending Love collection.  That way, the inside of the bag is decorated, and the outside is all SPARKLY and PURTY!
You also need a Top Note die, though I am using 2.  I cut the blush blossom one on the stitching, so that I could mat them together.
You will also need a scoring tool, scissors, and sticky strip.  The embellishments are up to you, but I'll show you at the end how I finished mine up.
JRB CFBH gift bag 2JRB CFBH gift bag 3
Starting with the 11.5 inch side across the top of your scoring tool (please remove your cutting blade!), you need to score at these intervals - 1  1/8,   2  1/4,   5  1/2,  6  5/8,  7  3/4,  11.  Then, placing your 6 inch side across the top, score at 1 1/2.  Fold on all score lines.
JRB CFBH gift bag 4JRB CFBH gift bag 5
On the bottom, you need to cut out the far corner on the score lines.  Then you need to cut the score lines so you will be left with two wide panels and 2 narrow panels.  The two narrow ones will have a score line running through them, but do not cut them.  Click on the picture to see it better.  You need to get a ruler and lay it on each one of the uncut score lines marking it at 2 1/2 inches.
JRB CFBH gift bag 6JRB CFBH gift bag 7
OK, so now you need to lay that ruler on the mark and the corner of the bottom score line, and score it on the angle.  Click on the second picture fora good look at what it should end up like.  Do this on both narrower panels.  Fold them into what will be the inside of your box.
JRB CFBH gift bag 7.5JRB CFBH gift bag 8
Put a length of sticky strip on the narrow piece at the end, right along the score line.  Then remove the liner and fold the DSP around to make the box.
JRB CFBH gift bag 9JRB CFBH gift bag 10
Fold the two narrower flaps in, and using another piece of sticky strip, adhere the two final flaps together to complete the box portion.  Now, to create the flap.  If you are using two pieces, glue them together and then score it right in front of center.
JRB CFBH gift bag 11JRB CFBH gift bag 12
Add a couple pieces of sticky strip to the back of the top note, making sure to have it on the side that is after the center line. Then stick it to the back of the bag, keeping the score line a smidgen above the top, so it is easier to fold over.
JRB CFBH gift bag 14 finished

Thứ Tư, 19 tháng 10, 2011

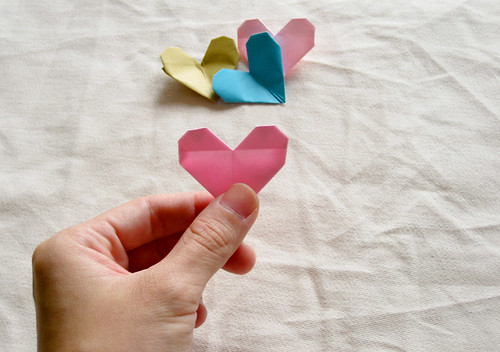
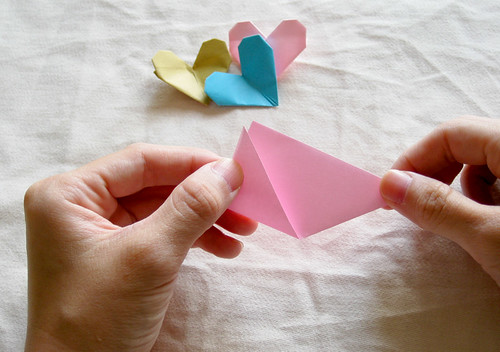
Very easy Origami Heart Tutorial


banner 
Lots of pictures to follow and very easy to make. The tutorial continues behind the cut/link under the picture to save your computer from loading all the images in case you don’t care to do heart origami!
  
24


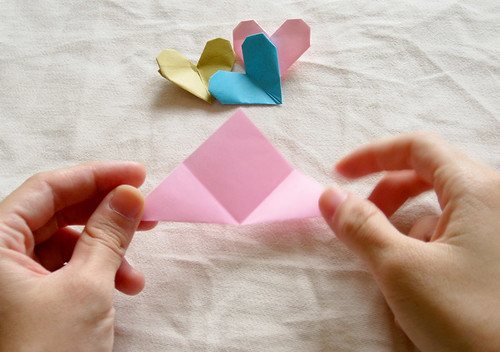
1. Fold a square piece of paper in half diagonally.
01
2. Fold bottom corners of triangle to top point.
02
03
3. Unfold.
04
4. Fold top of triangle to bottom center point.
05
5. Refold the tips of triangle.
06
07
6. Fold top of diamond to side. Repeat on both sides.
08
09
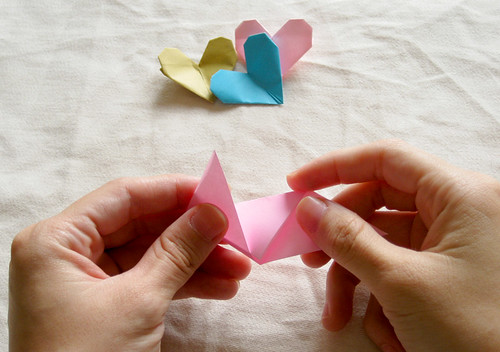
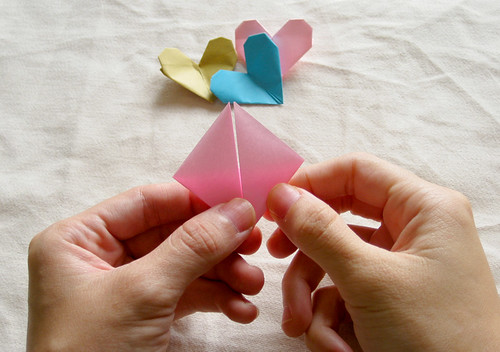
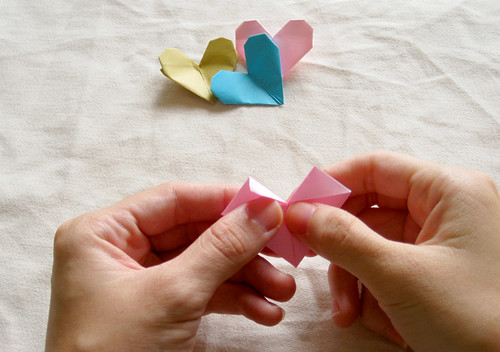
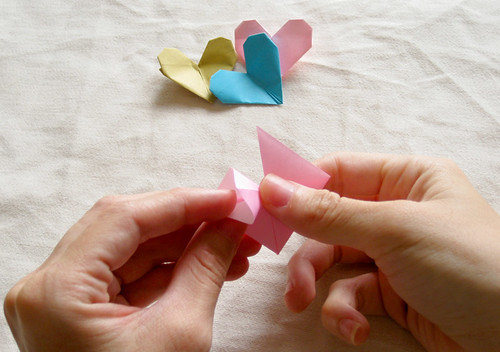
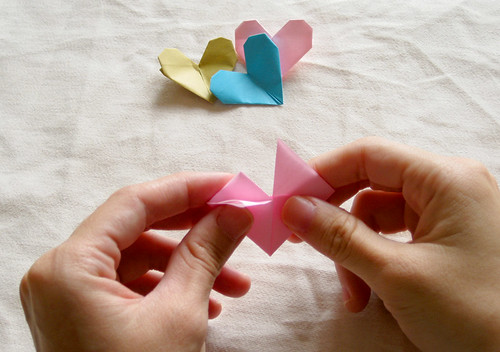
7. Unfold. Open the fold and squash down to form the top part of heart. Use folded lines as a guide.
10
11
12
13
14
8. Repeat on both sides.
15
9. Fold corners in to make a more rounded shape. Repeat on both sides.
16
10. Flip over.
17
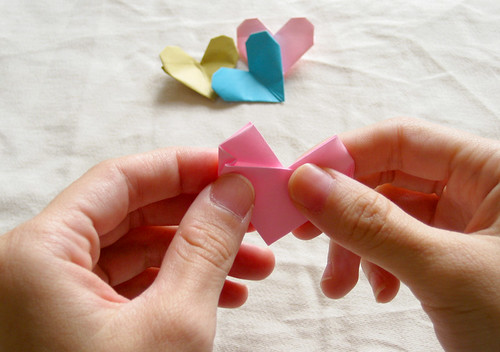
11. Fold the corners into the pocket. Use fold marks as a guide.
18
19
12. Repeat on both sides.
20
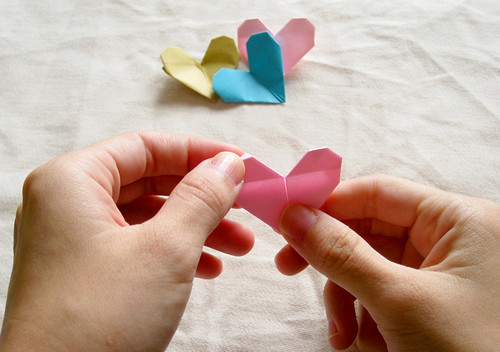
13. Turn over to front. Fold the top of the heart down. Repeat on both sides.
21
22
View from the back:
23
and TA DA!! Finished :}
24
 

Thứ Sáu, 14 tháng 10, 2011

Paper crafts: How to make a Kusudama

Kusudama are origami flower balls – technically they don’t need to be flowers but any polygonal orgami model, but traditionally these balls were made from actual flowers. The flowers used were medicinal herbs, hence the name kusudama, which is a portmanteau of kusuri (medicine) and dama (ball). Over time, people began making models of these balls in origami, as good luck charms or decorative gifts.
As you can probably tell from the fact that I’m posting 10 hours late, kusudama can be quite a labour of love. The one I will show you today has 40 individual flowers. The classic sakura model you may have seen in many places online takes 60 units, which are built up into flowers before being tied or glued together. If you enjoy paperfolding, however, making these elegant structures is a very relaxing pastime.
 Paper crafts: How to make a Kusudama

To make this type of kusudama you’ll need:
  • 40 squares of paper – this design shows both sides of the paper, so I used double-sided origami paper.
  • needle and thread
  • string or ribbon for hanging and optional tassel
  • patience!
The flower shown here can seem really fiddly at first, but once you’ve done one or two and got a feel for how they fold together, you’ll find them much easier.
The first part is to precrease the paper so the flower folds together easily.
precrease kusudama flower
Make a diagonal fold across the paper, and open it out. Make a second diagonal fold and open out again.
Turn the paper over and fold it in half lengthwise. open out, turn 90 degrees and fold in half again. Open out.
You can now pop and squash the paper easily into a square with triangles inside.
With the open end away from you, fold in the side corners of the square to the centre crease. Flip over and repeat on the other side.
Open out the folds and use them as lines to squash-fold into triangles – do this on all 4 sides.
Flip the folded paper so that a plain diamond shape is visible instead of the triangles. Fold in the top edges of the kite to the centre crease, then fold down the point. Repeat for the other three sides.
You should now have something which resembles a strawberry! That’s all your pre-folding done, now to open it out and refold into a flower.
Open out all the folds, and pop the paper inside out. Now to refold all the corners. Use the pre-creases to fold the sides behind one corner. Re-fold the top edges to the centre crease and the point downward, following the precrease folds as they are. The first and second corners will be easier, the third and especially the fourth might be a little trickier. Just remember that the sides to each corner go backward, and it’ll start to make sense – I hope! (I’m writing these instructions at 4am my time, so I hope they *do* make sense!!)
Use the exact same process to fold 40 flowers. Now take a needle and thread, and string the flowers into 4 circles of 10 flowers each, by passing the needle through the very tip of each flower base.
Cut two lengths of thread and cross them. Stack the circles on top, and bring the thread up between the flowers. Tie your hanging string or ribbon into a loop and string it onto two of the threads. Tie all the threads together tightly in a square knot, shuffling the flowers rond as necessary, and trim off the loose ends.

Paper crafts for gifts: no-fuss paper roses


the easiest paper roses you’ll ever make!


Paper crafts for gifts: no-fuss paper roses
The ornamental design of paper doilies is what makes these roses so naturally exquisite.  Because the beauty is intrinsic in the material, these paper doily roses require little fuss to look beautiful.


1. Take an 8″ red paper doily and cut a straight line to the center.
2. Roll the doily, making sure the wrong side faces up.
3. Twist the end.
4. You may use floral tape to create a stem, but I used what I found at home — green painter’s tape.
5. Optional: you can cover the stem with ribbon for a more polished look.
There you have it — a paper rose in seconds!  These paper doily roses are not only simple to make, they are also very inexpensive.  I managed to pick up half a dozen red paper doilies for $1 at the dollar store.

A bouquet of these is certainly a stunning substitute for bows when wrapping gifts, but, with the help of some glue and magnets, I also fancy having a beautiful collection of paper roses on my fridge!

Thứ Năm, 13 tháng 10, 2011

Unique crafts for gifts: paper pens tutorial

Unique crafts for gifts: paper pens tutorial


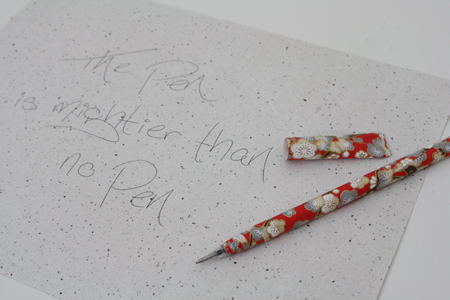
A few weeks ago I had a major “I could make that” moment when one of my coworkers handed me a pen. It was free pen she’d gotten from the campus copy store, and the entire body of the pen was paper. It was lightweight, had a wonderful feel to it, and looked pretty sweet.
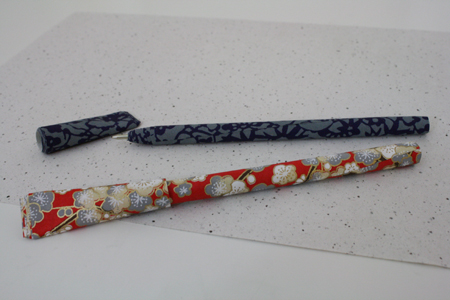
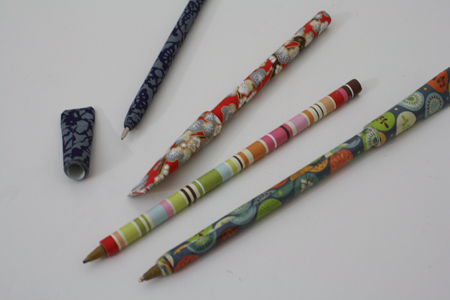
I stared at it and then said, “Hey, I could totally make one of these!”In addition to being practical, easy, fast and pretty, this is one of those often hard-to-find crafts that could actually serve as a perfectly guy-ish, useful, elegant and handmade item to give Dad on Father’s Day. Maybe not with the red floral pattern, but that blue one is reasonably manly, doncha think?
What you’ll need:
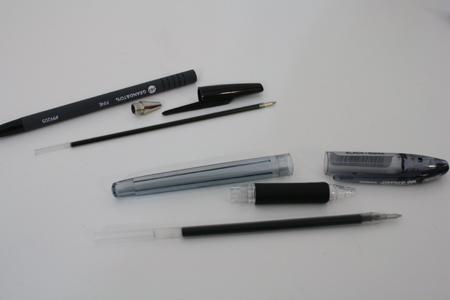
  • pens – the kind that can be taken completely apart with relative ease, and have a cartridge that’s pretty much just a straight stick shape – no fancy bits on the end
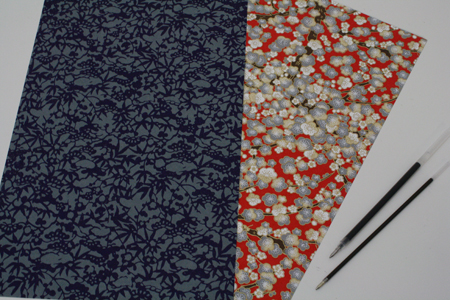
  • pretty paper - any reasonably lightweight kind. Japanese paper works really well for this, but any paper that’s about computer paper weight will work.
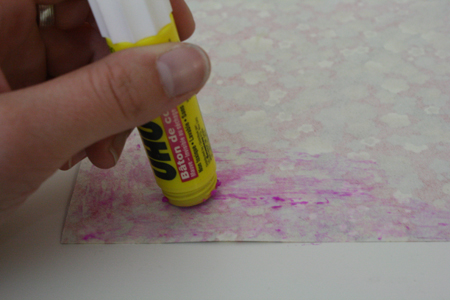
  • glue stick
  • white glue
  • scissors
  • paint brush
  • varnish
———————————————–
Putting it all together:
1) Take your pens apart and discard all the bits so you’re left with just the cartridge. As mentioned in the materials list above, you ideally want a pen cartridge that doesn’t has an even, smooth shaft with no funny bumps at the end (yes yes, haha, let’s all have a quick giggle after that little description). If the cartridge isn’t even all the way to the end, it will be harder to wrap the paper evenly around it.
2) Take a piece of paper about 11″ long (so a standard size) and cut it so that it’s about 1/4 inch wider than your pen cartridge is long. Keep whatever scrap you cut off of one side – this will become the pen’s lid. As stated above, Japanese paper works brilliantly for this project. It is soft and flexible, adheres to itself very easily with the application of a little glue, and is easy to roll evenly. Scrapbooking paper and such will also definitely work, it’s just not quite as dreamily simple to roll smoothly around the pen cartridge. But the first time I tried this project I used scrapbooking paper, and it turned out fine.
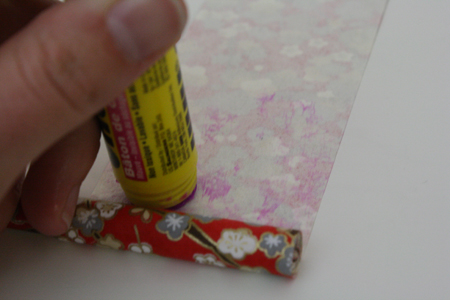
3) Lay your paper right side down and apply glue to its underside (which will be facing up). Keep going with the glue till about halfway up your sheet of paper. Be sure to get glue right up to the edges of the paper.

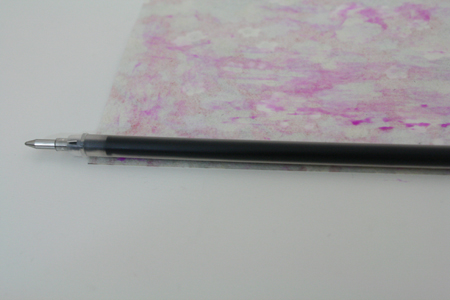
4) Lay the pen cartridge along it so that the writing end sticks out over the edge of the paper.


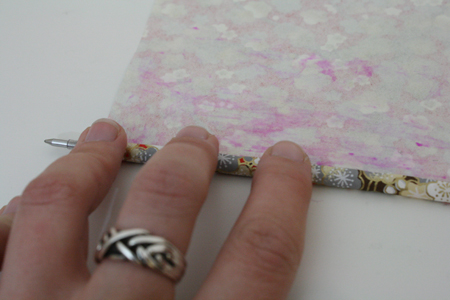
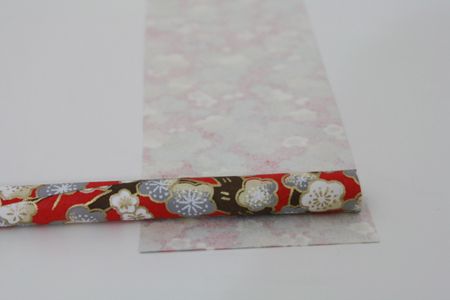
5) Roll the paper tightly around the cartridge, and keep rolling. When you reach the point where the glue stops, apply more and roll the pen around and around until you run out of paper.
You can try to roll in a straight line, or you can deliberately go a bit crooked so that the writing end of your pen has a bit of a gradual point to it. I tried to roll the paper totally straight and just couldn’t make it happen, but in the end I liked the look of the uneven, gradual-point effect at the pen’s end.
Be sure to glue the final edge of the paper very thoroughly, and make sure it’s completely stuck down and smooth.
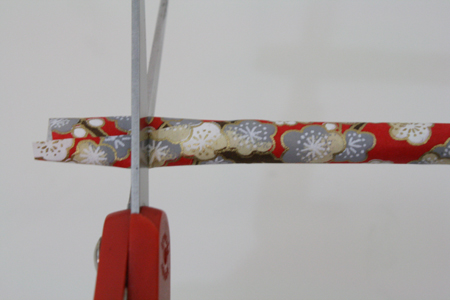
6) At the top end of the pen, cut off any excess paper so that the paper only goes about 1/8 to 1/4 inch above the end of the pen cartridge.

7)  Take the paper you set aside in step 2 to use as the lid, and lay it right side down. Place the upper (non writing) end of your pen on it.

8) Roll the paper once around the pen, keeping it just slightly loose. Then apply glue to the remaining, unrolled paper.

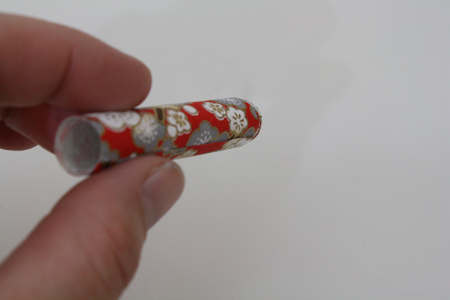
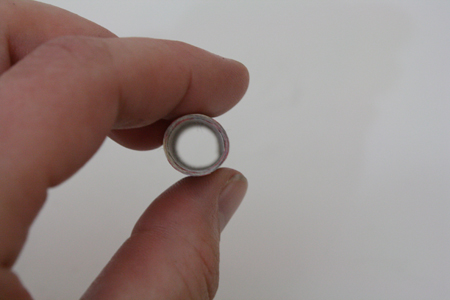
9) Continue rolling the paper, trying to keep the edges even, until it is all used up. Glue the final edge down well, and pull this rolled paper off of the pen. You should now have an open-ended tube that fits a bit loosely over your pen.

10) Apply some white glue to the inside edge of one end of your tube, then press down so that end of the tube flattens and sticks together. Hold until dry enough to stay in place on its own. Now your pen has a lid.
11) Now apply two or three coats of varnish to the pen and the lid. (This is why you wanted to keep that lid slightly loose – after a couple coats of varnish the pen should fit into it snugly, but without having to force it and wreck the paper.
12) Write something stunning.


Labels

2012 lily/hemerocallis series 2012 magnolias and more Accessories afghan Amigurumi amirugumi Art Autumn 2012 baby crochet baby knitting Baby learn bag Bags Bead beeches Being thankful books booties bows boxes bracelet cake candy Cards carving carving fruit carving fruits Change in the garden Change in the gardens Christmas Letter clay clematis Closing down the gardens for winter coloring Conifer companions conifers conifers/hellebores Cornus x rutgersensis 'Galaxy' hybrid crafts crochet crochet pattern croci croci/hellebore/eranthus crocus cross stitch Crown of Thorns Curtain cutting paper daffodils Deciduous trees Delphiniums design/rhodies/tree peonies Developing the azalea walk 2012 diy Doll Dolls Door County Dragonflies in my studio... drawing dress Dusk Early August 2011 Early season gardens to 2013 Early spring Early spring gardens Early summer 2012 earring Easy dot Embroidery Embroidery - Thêu End of August 2011 epimediums Eranthis hyemalis etc. Fagus sylvatica 'Asplenifolia' Farewell to fall fashion Favorite garden views 2009 Favorite plant descriptions February in Wisconsin post #1 February in Wisconsin... post #2 February snow Felt First day of Winter 2011 first frosts First snow First snow... 11/10/11 Floral arrangements - Cắm và bó hoa flower arrangement Flowering crab apple page flowering crab apples flowers crochet fly over country Flying Pig foggy mornings Folding paper Folding towels food food decor Four seasons Funny garden Garden friends Garden guests Garden photos garden views Garden views 2010 garden views 2011 Garden views 2012 Gardens in review GBBD for JuneAmethyst Getting personal... Gifts Giving thanks Glass Shade gloves Green Bay Botanical Gardens Hair hair clip Hanging Lotus shade hat hats helebores Helebores and hepatica hellebore Hellebores Hemerocallis Hephestos tree peony Heptacodium Heptacodium miconioides Hoar frost holiday craft holiday crafts home and garden Hostas Hostas as landscape plants Houseplants how to Ice storm Individual plant portraits Iris Jan-May 2011 overview Japanese maples Japanese maples at Wavecrest Nursery jewelery jewelry jewerly Josephine clematis July 2011 review Khăn - Mũ kirigami knitting knitting pattern knot Labels... Late April 2013 Late autumn gardens Late blooming annuals Late July 2012 lawns Lewisia Lilac Lilacs lilacs 2013 Lilies and Hemerocallis macrame Magazine Magnolia 2013 Magnolia blooms Magnolia Daybreak Magnolia shade and transom Magnolia tripetala magnolias Maintaining a positive state of mind Maintaining gardening perspective making flower making flowers Making my own daylilies Making toys Memories from my youth mid-April 2012 walk-about mid-August 2012 Mid-December mid-June blooms Miniature orchids mittens Móc khăn trải bàn More cold mums nail Nail art necklace necklaces New azalea walk new glass projects Nghệ thuật No rain Northern Wisconsin November 1st color October color 2011 October garden pics Old trees Oleander One's Autumn Open gardens or Orchid case orchids orchids an walk in the woods orchids and hellebores Orchids and more Orienpet lilies 2011 oriental poppies Origami Pages painting Panels and Windows Panicum virgatum 'Shenandoah' Paper paper cut Patchwork Pella tulips peonies peonies in the studio and the gardens petunias 2011 Phalaenopsis orchids pillow Pillows Pining for Spring #2 Pining for Spring #3 Pining for Spring #4 Pining for Spring... Pinus dens 'Oculus Draconis' Plant moves and pruning plastic Play and learn for baby poncho Primula primula and hyper-tuffa Prom weekend Quercus coccinea Quilling paper Quilt Rain finally recycling repair work Request Return to October Rhododendrons Rhododendrons 2013 ribbon ring Rockery redo Rotary Gardens in Janesville rugs scarves Schlumbergera x buckleyi September blooms Several Examples of my work in stained glass lamp shades sewing sewing detail shawls shoes and sandals skirt skirts slippers Small wonders Snow scenes Snowstorm Draco socks Spring spring 2011 Spring 2012 spring 2013 Spring bloom spring bloom overlap Spring peak bloom Spring snow storm Stats still cold but there are plants that enjoy this... Still winter Sumac Summer 2011 summer peak 2011 sweater tablecloths tags Tatting Thalictrum rochebrunianum... Thanksgiving cactus The Christmas Gift The first real snowstorm of the winter (2011-2012) The fog is also a gift The gardener's life Thêu Thinking spring Thoughts from the files #1 Tiffany 24" Rosebush shade Touches of Autumn toys tree peonies Tree removal tulips Tutorial Tutorial video underwear Valentine's day Vermont in Autumn Video weaving wedding white gardens? White in the gardens Winter protection Winter scenes Winter/Summer comparisons wintering the non-hardys Wisconsin Wisconsin... Witch hazel/eranthus/ orchids/amarillis wool wrapping and packaging yarn